How to create a database branch
info
DBLab Engine must be version 4.0 or higher.
GUI
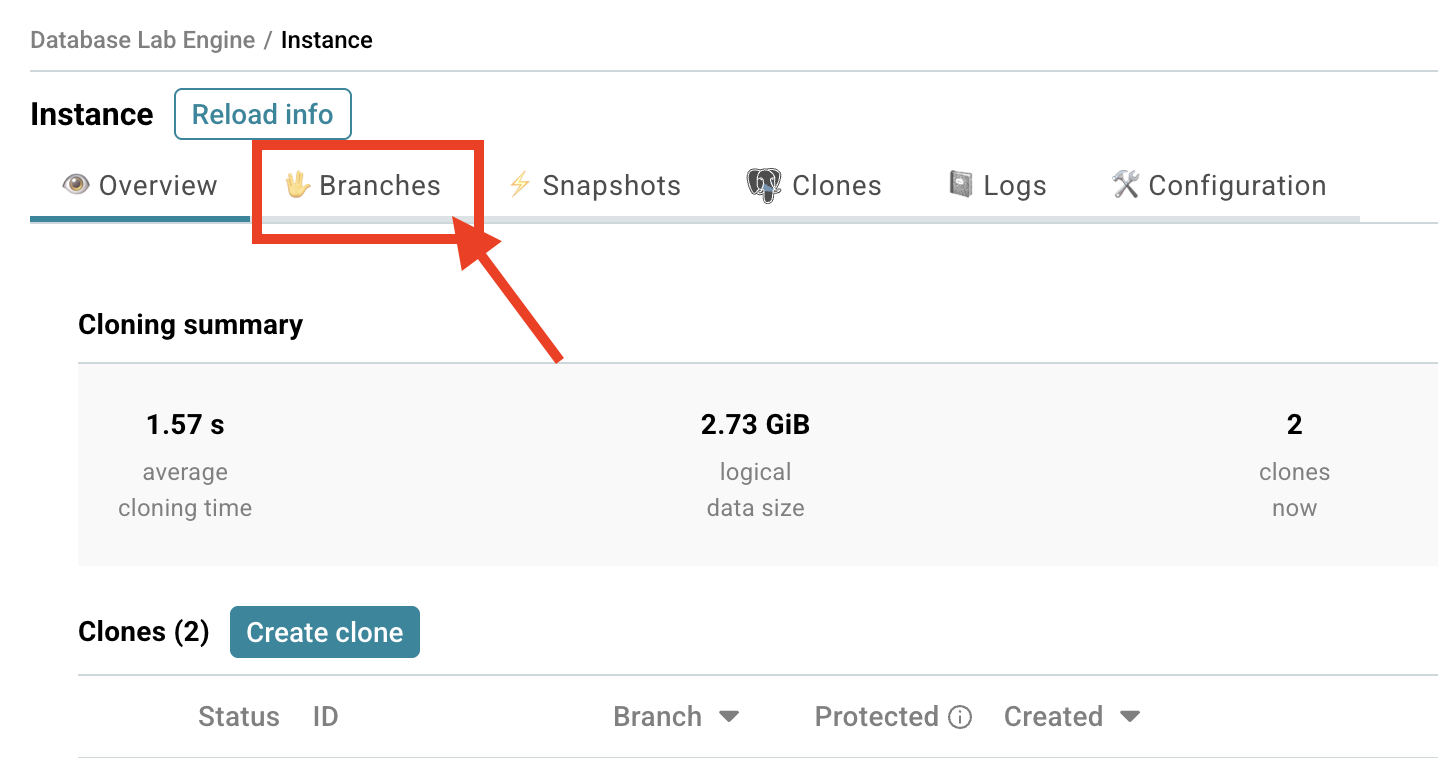
- Go to the Database Lab instance page.
- Choose the Branches tab.
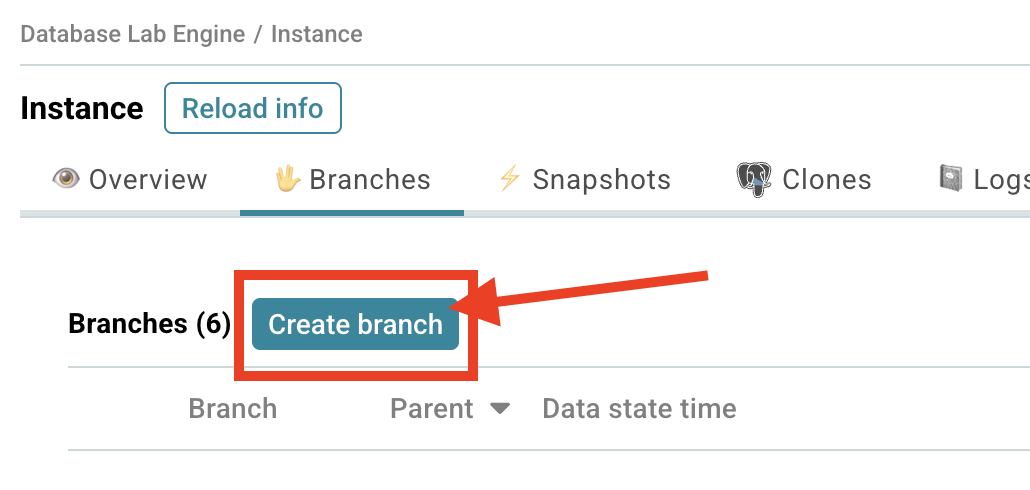
- Click the Create branch button.
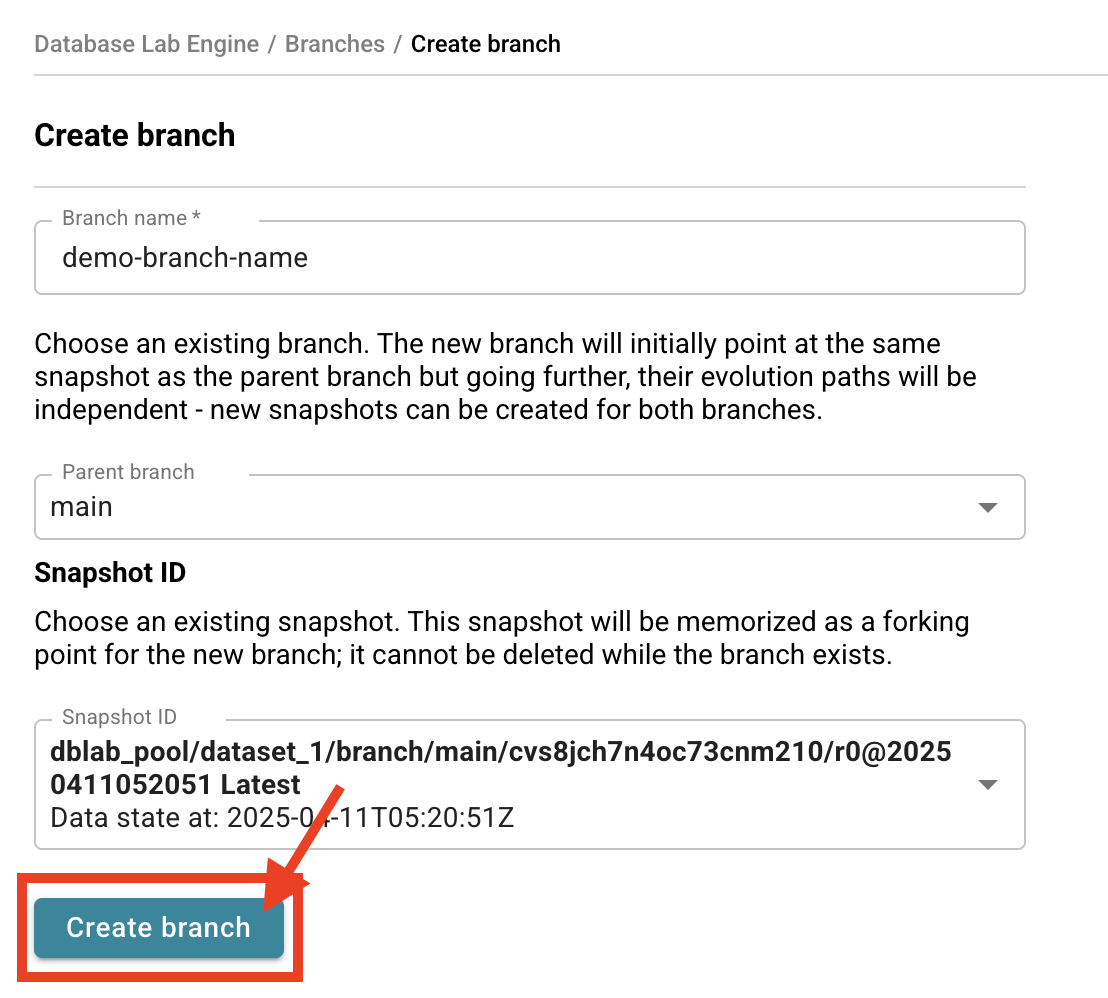
- Fill the Branch name field with a meaningful name.
- (optional) Change the Parent branch and Snapshot ID if needed.
- Click the Create branch button.
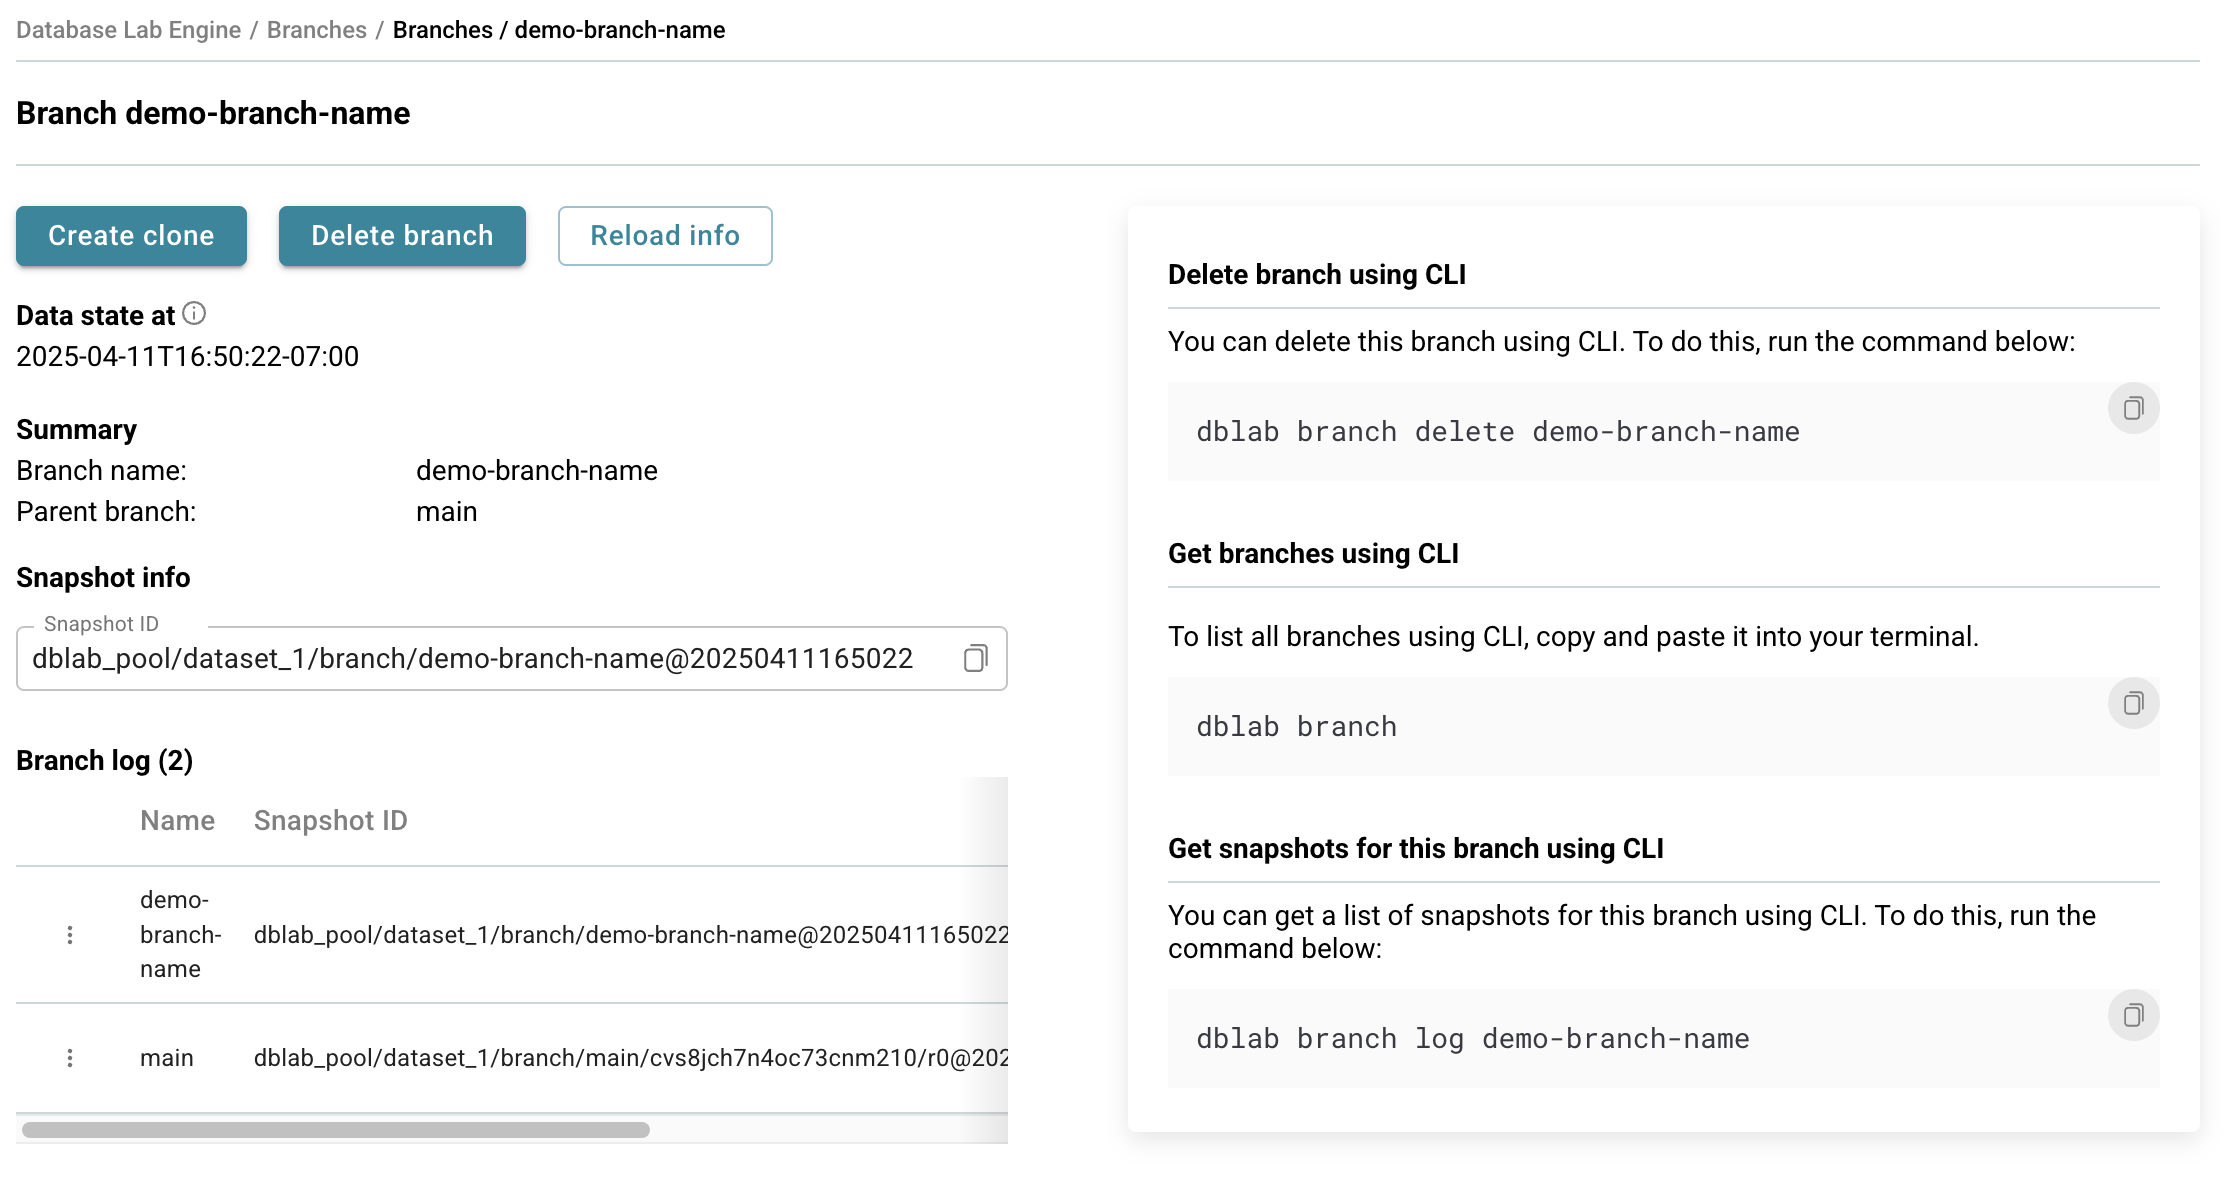
- You will be redirected to the Database Lab branch page.
CLI
Before you run any commands, install Database Lab CLI and initialize configuration. For more information, see Install and initialize Database Lab CLI.
Reference
- Command
dblab branch
Basic branch creation
Create a database branch using the dblab branch command and specify the branch name; after creation, you will switch into the new branch automatically:
$ dblab branch test
Create a database branch with a different parent
By default, the created branch will be a child of the current branch. You can specify a different parent branch using --parent-branch:
$ dblab branch --parent-branch dev test
Create a database branch from a specific snapshot ID
- List all available snapshots:
$ dblab snapshot list
[
    {
        "id": "SNAPSHOT_ID_1",
        "createdAt": "2025-04-07T20:16:57Z",
        "dataStateAt": "2025-04-07T20:16:57Z",
        "branch": "test",
        ...
    },
    {
        "id": "SNAPSHOT_ID_2",
        "createdAt": "2025-04-07T20:14:43Z",
        "dataStateAt": "2025-04-07T20:14:43Z",
        "branch": "test2",
        ...
    },
    ...
- Create a database branch specifying the desired snapshot:
$ dblab branch --snapshot-id SNAPSHOT_ID_1 test
Related
- Guide: Delete a database branch